
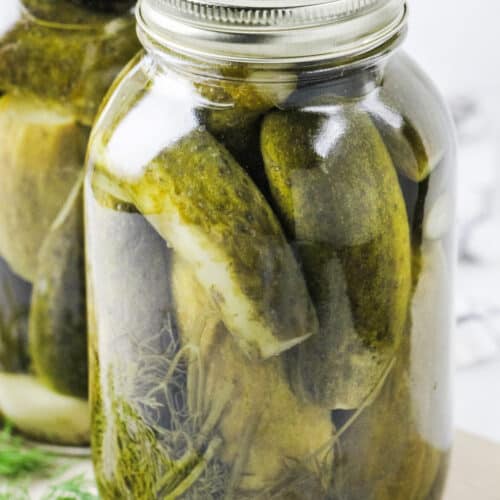
If you’ve ever wanted to try your hand at preserving, this canned dill pickle recipe is for you!
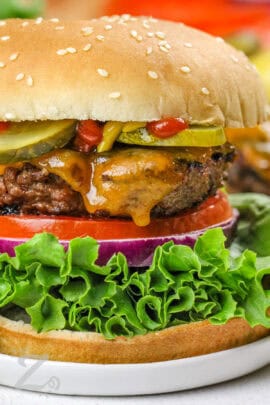
Make your own crisp and tangy homemade dill pickle chips to top sandwiches, and hamburgers, or blend into a crunchy relish!
Get deli-quality pickles at a fraction of the price and enjoy your garden harvest throughout the year!

Crisp and Crunchy Dill Pickles
- With a little prep and a few ingredients, you can preserve your garden (or farmer’s market) bounty of cucumbers to use all year long!
- Cut cukes into halves, spears, or slices, and experiment with different savory herbs and seasonings to suit your taste!
- Add a small ribbon and tag to jars of pickles and gift to friends and family!

Ingredients and Variations
Cucumbers: Pickling cucumbers are smaller in size with fewer seeds (Asian or Japanese varieties are ideal because they are seedless). Choose fresh and firm cukes with no blemishes or cuts. Be sure to wash them to remove any wax they may have been shipped in.
Brine: This is made with a base of white vinegar and water. Garlic and dill add savory flavor. Other seasonings to try are black peppercorns, red pepper flakes, or fresh fennel or celeriac fronds. Be sure to use kosher salt as it is additive-free.
Variations: Once you get the hang of the process, feel free to pack your pickles with pearl onions, sliced jalapenos, sliced carrots, or green beans. Enjoy on hamburgers, diced into creamy dill veggie dip, or sliced into chips for stuffing in tuna salad sandwiches.


How to Make Canned Dill Pickles
- Sanitize jars, seals, and rings per recipe directions below.
- Cut cucumbers into spears or slices about 1/8” to a ¼” inch thick.
- Bring water, vinegar, and salt to a boil.
- Divide dill and garlic between sterilized jars and pack with cucumbers.
- Pour boiling vinegar into each jar, leaving 1” headspace. Seal with lid and ring and finger-tighten.
- Place jars in canner and cover with water to at least 1” over the top. Cover pot and return to a boil.
- Process pickles depending on jar size (see recipe below).
- Remove jars from the canner and cool for 24 hours. The lids should be concave (slightly inward), and vacuum sealed.
- Store for 3 weeks in a cool dark place away from direct light. Refrigerate once opened.

Candace’s Canning Tips
- Preparation is key for a fun, safe, and productive canning session! Critical equipment to have are new sealing lids (used canning jars and bands are fine). Jar lifters have rubber grips that will easily lift hot jars from the canning bath, unlike kitchen tongs, and are well worth the expense.
- A wide-mouth funnel keeps the rims of the jars clean which is important for a proper and sanitary seal. Wide mouth funnels are exceptional for other purposes like pouring protein powder and frozen fruits into smoothies, making jars of overnight oats, and pouring food into zippered bags for freezing.
- Tightening the bands by hand allows some air to escape and creates an excellent seal.
- Place jars on a cutting board or folded kitchen towels after they are removed from the canner. Listen for the “pop” sound which means they are properly sealed.

Storing Canned Pickles
- For best results, use homemade canned pickles within a year and always refrigerate them once they are opened.
- When opening stored pickles, lids should be tight and pop.
- Discard anything that does not appear tightly sealed, has any mold, or tastes off.

What to Serve with Pickles
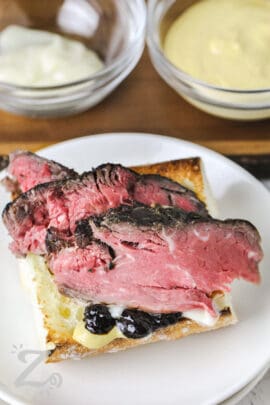


Have you tried this Dill Pickle Recipe for Canning? Leave a comment and rating below!
Dill Pickles
Equipment
Ingredients
- 3 pounds pickling cucumbers
- 2 cups white vinegar 5% acidity or greater
- 2 cups water
- 3 Tablespoons kosher salt *, or 2 Tablespoons pickling salt
- 1 cup fresh dill or 4 heads fresh dill, or 4 teaspoons dill seeds
- 4 cloves garlic small cloves
Instructions
- Partially fill a water canner with hot water. Place clean canning jars in the water, cover, and bring to a boil on high heat**.
- Meanwhile, about 5 minutes before processing, place lids in boiling water and follow manufacturers instructions. (I usually use a separate smaller pot for this.)
- Cut a thin slice from the ends of the cucumbers. Quarter larger cucumbers, and cut medium cucumbers in half.
- In a medium pot on medium high heat, combine vinegar, water, and salt and bring to a boil.
- Remove hot jars from canner. Place 1 head dill and 1 clove garlic in the bottom of each jar. Pack with cucumbers.
- Pour boiling vinegar mixture over the cucumbers, leaving ½ inch of headspace below the rim. Wipe rim clean if needed. Center lid on jar and screw band on fingertip tight.
- Place jars in canner, ensuring they are covered by about 1 inch (add more hot water if needed). Cover and return water to a boil. Once water is boiling, process for 10 minutes for pint jars and 15 minutes for quart jars***.
- Remove jars from canner and cool for 24 hours. After 24 hours, confirm that the lid is curved downwards and vacuum sealed****. Remove screw bands and dry them. Screw back loosely on the jar (or store separately). Store for 3 weeks before enjoying. Serve chilled and refrigerate after opening.
Notes
Makes 4x pint jars or 2x quart jars *For best results, use Diamond kosher salt, or a brand that does not contain anti-caking agents. These additions may make the pickles cloudy (but they are still edible).
**Due to longer processing time, jars do not need to be sterilized, but do need to be hot.
***High altitudes will need to add processing time:
1,000-3,000 feet add 5 minutes
3,000-6,000 feet add 10 minutes
6,000-8,000 feet add 15 minutes
8,000-10,000 feet add 20 minutes
****If any jars did not vacuum seal, refrigerate and use within 3 weeks.
Nutrition Information
Nutrition information does not include optional ingredients or garnish and is an estimate. It may change based on actual ingredients and cooking methods used.
©Our Zesty Life. Content and photographs are copyright protected. Sharing of this recipe is both encouraged and appreciated. Copying and/or pasting full recipes to any social media is strictly prohibited.
Like our recipes?
Follow us on Pinterest!
REPIN this Dill Pickle Recipe for Canning!


Recipe from The Complete Book of Year-Round Small-Batch Preserving


OMG!!! I am new to canning but this year i have canned everything so i thought why not try dill pickles. These are awesome. My husband has already devoured 3 pint jars so now I’m canning 8 more pints. Looks like this is going to be our go to pickles. Thank you for sharing this recipe.
Hi Elizabeth, I am happy to hear that you and your husband really enjoyed these pickles. Homemade is so much better than store bought. Thanks for sharing your excitement, and happy canning!
I made these but did a test and scaled back on the portions
One jar came out more sour than the other?
I have only made this recipe as listed, so I can’t say for sure what happened. But it could be a bit too much vinegar that is making the smaller batches taste sour.
These turned out so good
That’s fantastic to hear, Marie! I’m so glad you enjoyed them—nothing beats homemade dill pickles!
Haven’t canned pickles for 2 decades, but gave it a try today. Surprised that 7 lbs cukes only filled 4 qt. jars, but can’t wait for 3 weeks to go by so we can pop one open and try them!
Yay Mary! Can’t wait for you to try them!!❤️
Sounds easy
It is so delicious! I hope you enjoy it, Stella.