
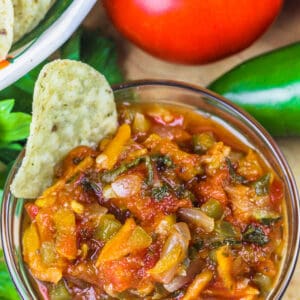
Grab those late summer sun-kissed garden veggies and make the best Garden Salsa recipe ever!
Chock full of fresh vegetables, herbs, and spices, this easy tomato salsa recipe will perk up everything from a taco charcuterie board to an omelette! This zesty recipe will guide you in how to can salsa safely and easily. Chunky garden salsa is so versatile it can be altered with any combination of herbs or veggies possible. Even fruit is not off limits! Make it as mild, zesty, salty, or spicy as desired. Colorful jars of garden salsa also make pretty gifts for the holidays!

Best Homemade Salsa
- If the garden is over-grown with late summer herbs and vegetables, make your own gourmet salsa and enjoy it all year long!
- Everyone loves a big bowl of colorful, zesty salsa and homemade means the ingredients and flavor profiles can be switched up! Try a green jalapeno salsa or a fruit-based mango or peach salsa!
- This is the best salsa recipe for canning because it preserves all the delicious flavors of home-grown or farmer’s market vegetables and herbs!
- Gift friends and family some gourmet ‘Salsa Roja’ red salsa in half-pint or pint jars along with a bag of tortilla chips!

What’s in Garden Salsa?
TOMATOES: The key to great salsa is the tomatoes! Romas are favored because they’re meatier with fewer seeds and juice. Fresh is best but whole, peeled canned tomatoes will save some time.
VEGETABLES: Choose yellow and green bell peppers that contrast well with the red tomatoes. Shredded carrots add color, crunch, and sweetness. White or red onions are preferred over yellow since their flavors are milder. Planted too much zucchini? It’s an unexpected salsa ingredient but definitely adds to the gourmet style and the jalapenos make the spicy magic happen. The amounts can be adjusted, or they can be omitted entirely. Extras include corn, diced mangoes, peaches, or pineapple.
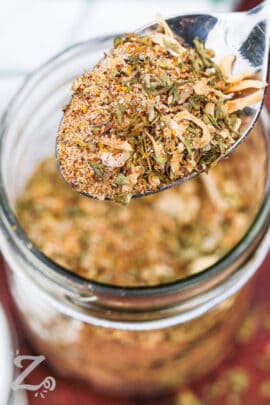
SEASONINGS: Salsa wouldn’t be the same without garlic! And oregano really adds to that garden-fresh flavor! This DIY taco seasoning blend can be used in salsa making, and in so many other Tex-Mex-style recipes. Or, try this DIY cajun seasoning for a spicy kick. White vinegar preserves the color and adds some tanginess. Apple cider vinegar can work if white isn’t available. Cilantro would be a delicious addition to this recipe too.

What Supplies are Needed for Canning?
This recipe for canning salsa is simple and straightforward, and produces delicious results every time!
- If you’ve ever wondered how to can salsa, this is the only recipe you’ll need!
- Most stores sell an entire DIY canning kit including the canner, a selection of Mason jars with rings and lids, a canning funnel, jar lifter, and a lid magnet.
- To make prep go by fast and easy, a box grater and vegetable chopper will save time and ensure the veggies are cut in consistent pieces.
How to Make Garden Salsa
This homemade salsa recipe will make canning a breeze! Just follow these simple steps.
- Place all ingredients in a large pan and bring to a boil (as per recipe below). Simmer until thickened.
- Fill a water canner with hot water, carefully set jars in the water, cover with a lid and bring to a boil. Use a small pot of hot water to heat lids the same way.
- Remove jars from the canner and drain any water inside them. Then ladle salsa into each jar using the canning funnel, leaving ½” space at the top. Cover with lid and screw on the band.
- Return jars to the canner and add enough water to cover them by 1”.
- Cover and process (boil) for the recommended time, as directed below.
- Remove the sealed jars and place them on a towel on the countertop to seal for 24 hours. Remove the screw bands and dry the jars. Salsa can be stored with the bands on or off.

Tips & Tricks for Canning Salsa
- Keep ingredients cut, sliced, or shredded uniformly so a little bit of everything is in each bite! This also helps with proper cooking.
- This recipe makes a chunky salsa but a smooth salsa can also be made. Simply puree a cup or two of the salsa before sealing it into the jars.
- For best results, vinegar should be at least 5% acetic acid.
- Jars don’t have to be sterilized but do need to be hot. Make sure rims are wiped clean before adding the top and ring to ensure they seal properly. To make sure the jars are sealed, the lid should be curved inwards (concave).
- Test for a tight seal by pressing the center of each lid. If the lid can be pushed in and pops back, the jar was not properly sealed.
- If any jars don’t seal properly, simply refrigerate and use within 3 weeks.
Canning at High Altitudes:
Altitude affects atmospheric pressure, and therefore affects canning duration. The time given in this recipe is for altitudes up to 1000 feet above sea level. Depending on your location, adjust the time accordingly:
- 1000 to 3000 ft. – increase canning time by 5 minutes.
- 3000 to 6000 ft. – increase canning time by 10 minutes.
- 6000 to 8000 ft. – increase canning time by 15 minutes.
- 8000 to 10000 ft. – increase canning time by 20 minutes.

How Long Does Salsa Last?
- If there’s leftover garden-fresh salsa that won’t be canned, it will last about 3 weeks in the refrigerator. Give it a shake before using to redistribute the flavors.
- Freeze garden salsa in zippered bags for up to 8 weeks.
- The thicker the salsa, the better the texture will be when it’s thawed. Simply drain it in a colander and add fresh onions, or a bit of cilantro, before using.
Notes About Salsa
The image below show two different batches of salsa made at different times.
- The brighter one with bigger chunks was cooked and canned 24 hours prior to photographing.
- The darker, more red one, was made a couple years ago.
Different batches will likely not look the same due to varying levels of ripeness, varieties of tomatoes or other vegetables used. And over time, the sauce becomes more rich, the flavors meld together, and the vegetables blend together. Other factors could be that one batch may have been cooked slightly longer or processed slightly longer due to the varying size of each batch and jar sizes.

Recipes Using Garden Veggies!
- Restaurant Style Salsa – incredibly fresh
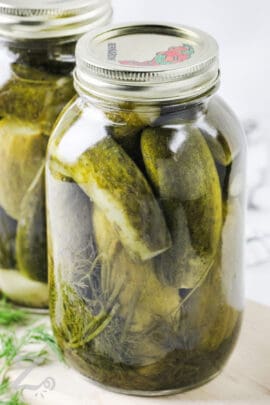
- Refrigerator Sweet Pickles – so easy!
- Quick Pickles – perfect preserving recipe
- Baked Tomatoes – easy side dish
- Easy Bruschetta Recipe – delish fresh appetizer
Garden Salsa
Equipment
Ingredients
- 1 ½ pounds tomatoes peeled and diced, about 6 tomatoes
- 4 jalapeno peppers seeded and finely chopped
- 2 cloves garlic minced
- 1 cup onion chopped
- 1 cup carrot shredded, about 2-3 carrots
- 1 cup zucchini shredded, about ½ medium zucchini
- ½ cup green bell pepper chopped, about ½ pepper
- ½ cup yellow bell pepper chopped, about ½ pepper
- ½ cup parsley chopped, flat leaf (Italian parsley)
- ½ cup white vinegar vinegar should be 5% acetic acid
- ½ cup tomato paste
- 1 Tablespoon dried oregano or ¼ cup chopped fresh oregano
- ½ teaspoon pickling salt or ¾ teaspoon kosher salt*
Instructions
- Place all ingredients in a large stainless steel or enamel saucepan. On high heat, bring to a boil. Reduce heat and simmer uncovered for 30 minutes, or until thickened.
- About 20 minutes before processing, partially fill a water canner with hot water. Place clean canning jars in the water, cover, and bring to a boil on high heat**.
- Meanwhile, about 5 minutes before processing, place lids in boiling water and follow manufacturers instructions. (Use a separate, smaller pot for this.)
- Remove hot jars from canner. Ladle salsa into jars, leaving ½ inch of headspace below the rim. Wipe rim clean if needed. Center lid on jar and screw band on fingertip tight.
- Place jars in canner, ensuring they are covered by about 1 inch (add more hot water if needed). Cover and return water to a boil. Once water is boiling, process half pint jars and pint jars for 20 minutes***.
- Remove jars from canner and cool for 24 hours. After 24 hours, confirm that the lid is curved downwards and vacuum sealed***. Remove screw bands and dry them. Screw back loosely on the jar (or store separately).
Notes
***High altitudes will need to add processing time:
1,000-3,000 feet add 5 minutes
3,000-6,000 feet add 10 minutes
6,000-8,000 feet add 15 minutes
8,000-10,000 feet add 20 minutes
****If any jars did not vacuum seal, refrigerate and use within 3 weeks.
Nutrition Information
Nutrition information does not include optional ingredients or garnish and is an estimate. It may change based on actual ingredients and cooking methods used.
©Our Zesty Life. Content and photographs are copyright protected. Sharing of this recipe is both encouraged and appreciated. Copying and/or pasting full recipes to any social media is strictly prohibited.
Like our recipes?
Follow us on Pinterest!
REPIN the Garden Salsa recipe!


Recipe from The Complete Book of Year-Round Small-Batch Preserving


Perfect timing for this recipe. My garden is ready for harvesting. Especially the tomatoes. Candace’s husband
Tomatoes and Zucchini! Great for both.